
Design your badge
Set the badge size, place names, company, QR code and images in the badge designer, and save the layout used for every print.
On this page
The badge designer sets the layout for every badge you print: from the Attendees page, volunteer stations, the kiosk and batch PDFs. Each event has its own design.
Design and save a badge
-
Step 1: Open the badge designer
Open your event and click Badge Designer in the left sidebar.
-
Step 2: Set the size
Pick a Preset size that matches your badge stock, or type a Width and Height in inches, centimetres or pixels. The default is 4 in × 2.125 in.
-
Step 3: Add elements
Under Add Elements, click the fields you want: First Name, Last Name, Email, Company, Job Title, Ticket Type, QR Code, Highlight Bar or Image.
-
Step 4: Arrange and style
Drag elements into place and resize them with the blue corner handle. Select one to change its Font, Size, Bold or Invert setting.
-
Step 5: Check the preview
Click Refresh Preview. The sample uses very long names and company names, so you can see whether text fits.
-
Step 6: Save
Click Save design. You should see Badge design saved. Every badge you print from now on uses this layout.
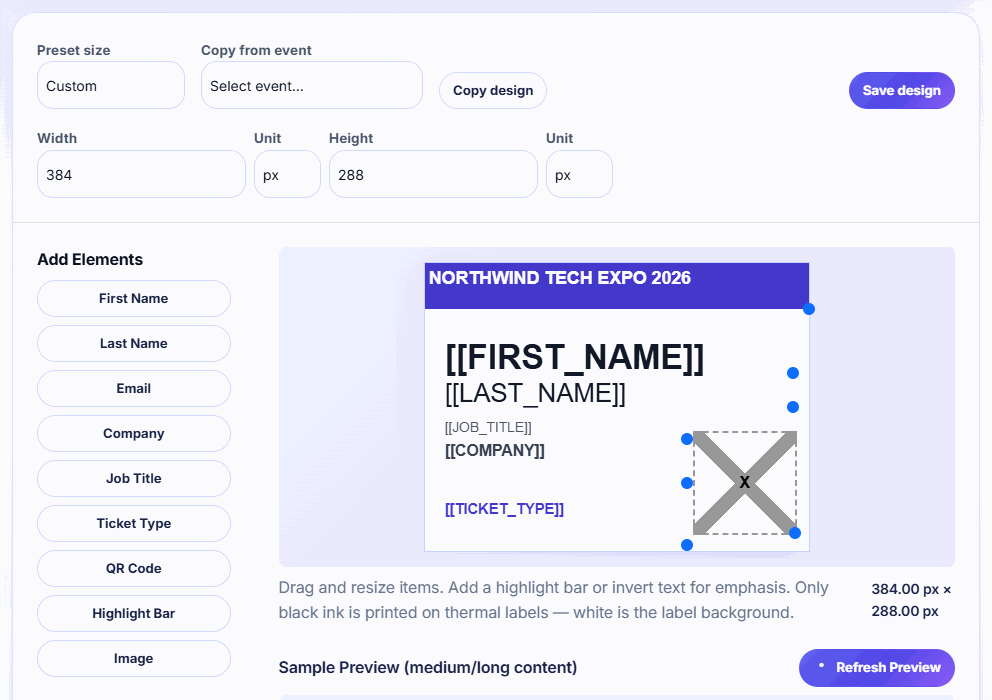
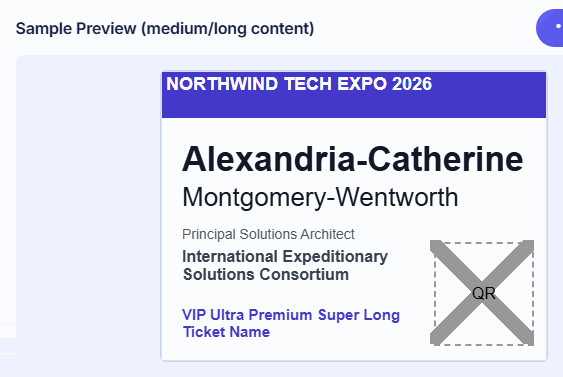
Click Save design at least once. Until you save, badges print on a small built-in 3.5 in × 1.125 in label layout, not the 4 in × 2.125 in starter layout you see in the designer.
Sizes
The presets are:
- 4.0 in × 2.125 in (the default, 384 × 204 px)
- 3.0 in × 1.0 in
- 4.5 in × 3.0 in
For anything else, such as a 4 in × 3 in or 4 in × 6 in card, choose Custom and type the width and height. There's no portrait switch: for a portrait badge, enter the narrower side as the width. The page size of the printed PDF matches the size you save, with no margins.
Tips for a readable badge
- Make the first name the biggest text. People read badges from a metre away.
- Use Highlight Bar or Invert (white text on black) for the ticket type, so staff can spot VIPs or exhibitors.
- Keep the QR code at least 2.5 cm (1 in) wide and away from the edge, so phones scan it quickly.
- Add your logo with Image. You can add as many images as you like; every other element can be added once.
- Badges print in black only. On thermal labels, white is just the label colour.
- Press Delete or Backspace to remove the selected element. Tick Show grid to line things up.
Tip: If some badges are already printed, the designer shows a warning. Changing the design now gives you two different-looking sets of badges, so make big changes before doors open.
Copy a design from another event
-
Step 1: Choose the source event
In Copy from event, pick one of your other events.
-
Step 2: Copy it
Click Copy design. The page reloads with that event's layout and size. Adjust it and click Save design.
The list shows only your own events. If the source event has never saved a design, you'll see No badge design found on source event.
On the Free plan, every badge also prints a small grey "Powered by Badgetrac" line at the bottom. Paid plans don't.
Related guides
- Print badges one at a time or in batches Print a single badge as people arrive, or print a selection or every badge as one PDF before the event.
- Printer and badge stock tips Match your badge size to your stock, set the print dialog to actual size with no margins, and test before doors open.
- Send badge proofs to attendees Email attendees a link to check their name, company and title before you print. Their fixes survive Eventbrite syncs.
Still stuck?
Tell us what you were trying to do and what you saw. We'll help you sort it out.