
Printer and badge stock tips
Match your badge size to your stock, set the print dialog to actual size with no margins, and test before doors open.
On this page
Badgetrac doesn't need special hardware. Badges are PDFs, so any printer your computer can print to will work. What matters is that the badge size, the printer's paper size and the print dialog all agree.
Choosing badge stock
| Stock | Good for | Badge size to set |
|---|---|---|
| Thermal labels (direct thermal) | Fast on-demand printing at the door | The label size, for example 4 in × 2.125 in or 3 in × 1 in |
| 4 in × 3 in cards | Clip-on or lanyard holders | Custom: 4 × 3 in |
| 4 in × 6 in cards or fold-over badges | Larger badges with logos | Custom: 4 × 6 in, or the front panel size |
| Letter or A4 sheets of badge inserts | Printing in advance on an office printer | The size of one insert. Each badge prints on its own page, so feed single cards where possible |
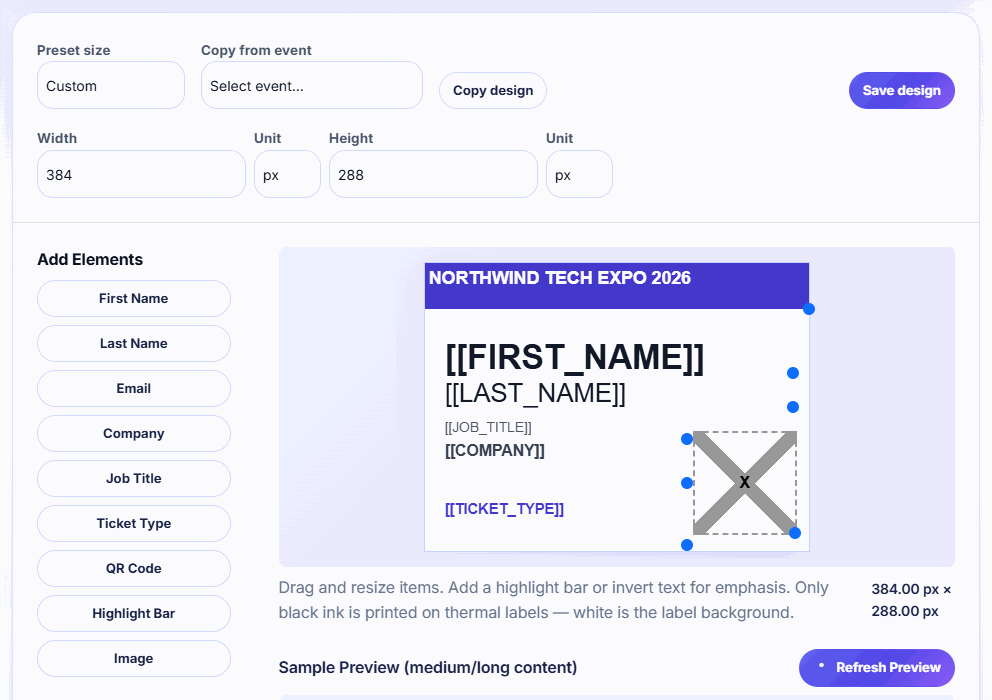
The default badge is 4 in × 2.125 in (384 × 204 px). Badges print in black only, which suits thermal printers.
Run a test print
-
Step 1: Measure your stock
Measure the printable label or card in inches, not the backing sheet.
-
Step 2: Match the badge size
In the badge designer, set the same width and height and click Save design.
-
Step 3: Set up the printer
In your computer's printer settings, set the paper size to your label size and pick the right media type (labels, card or continuous).
-
Step 4: Print one badge
Print a badge for yourself from the Attendees page.
-
Step 5: Check the print dialog
Set Scale to 100% or Actual size, Margins to None, and turn off Headers and footers. Avoid Fit to page.
-
Step 6: Scan the result
Scan the printed QR code with a phone to check it's sharp, then print a few more to make sure nothing drifts.
"Fit to page" shrinks the QR code. If the printer's paper size doesn't match the badge, the browser scales the badge and it prints off-centre or too small. Fix the paper size rather than the scale.
Print dialog settings by browser
- Chrome and Edge: open More settings. Set Paper size to your label, Margins to None, Scale to Default or 100, and untick Headers and footers.
- Safari and macOS Preview: pick the paper size in Paper Size and set Scale to 100%.
- Firefox: set Scale to 100 and Margins to None.
Most browsers remember these settings for the next print, so set them once per device.
On event day
- Keep a spare roll or pack of stock at every desk.
- Use the same printer model at every desk if you can. Then one set of instructions works everywhere.
- Print one badge at each desk before doors open, and scan its QR code with a phone.
- Thermal labels fade in heat and sunlight, so store them somewhere cool.
For self-service printing, see Run a self check-in kiosk.
Related guides
- Design your badge Set the badge size, place names, company, QR code and images in the badge designer, and save the layout used for every print.
- Print badges one at a time or in batches Print a single badge as people arrive, or print a selection or every badge as one PDF before the event.
- Run a self check-in kiosk Turn a tablet or laptop into a check-in screen: attendees type their email or scan their ticket and their badge prints.
Still stuck?
Tell us what you were trying to do and what you saw. We'll help you sort it out.