
Run a self check-in kiosk
Turn a tablet or laptop into a check-in screen: attendees type their email or scan their ticket and their badge prints.
On this page
Plan: Self check-in kiosk is included on the Growth and Pro plans and on Custom plans. On a smaller plan you'll see an upgrade page instead. Compare plans.
The kiosk turns any laptop or tablet with a printer into a self-service check-in screen. Attendees find their own registration and print their own badge, so your staff can focus on questions and walk-ins.
Before you start
- A laptop or tablet that can print to your badge printer. See Printer and badge stock tips.
- A camera on the device if attendees will scan ticket QR codes. The kiosk uses the front camera.
- Your badge design saved in the badge designer.
Set up the kiosk
-
Step 1: Prepare the device
Connect the laptop or tablet to your badge printer and print one test page from any app, so the printer is the default.
-
Step 2: Sign in and open the kiosk
Sign in to Badgetrac on that device, open your event's Attendees page, then choose Actions → Open self check-in kiosk.
-
Step 3: Print a test badge
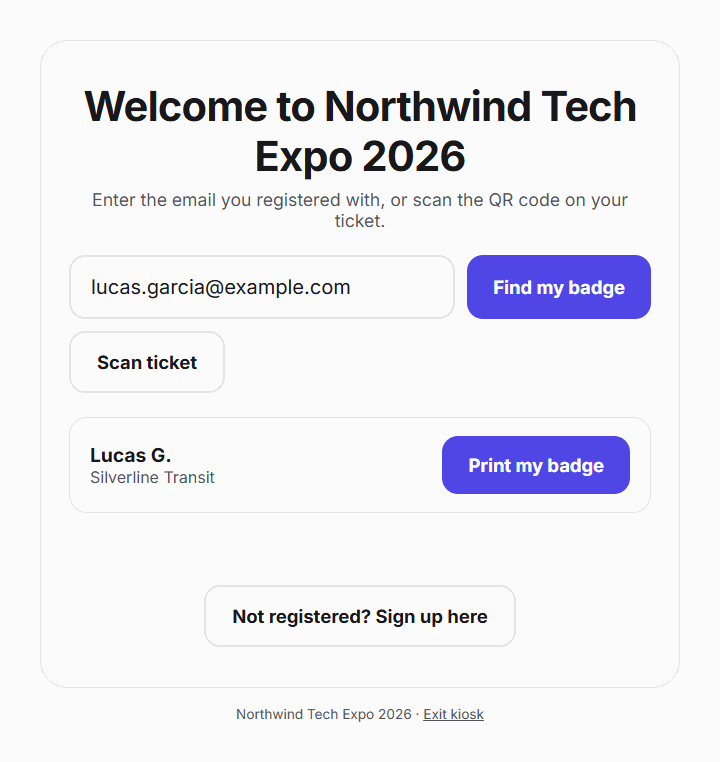
Type your own registration email and click Find my badge, then Print my badge. Check the size and margins in the print dialog before doors open.
-
Step 4: Leave it running
Put the browser in full screen. The screen clears itself after 20 seconds without input, ready for the next person.
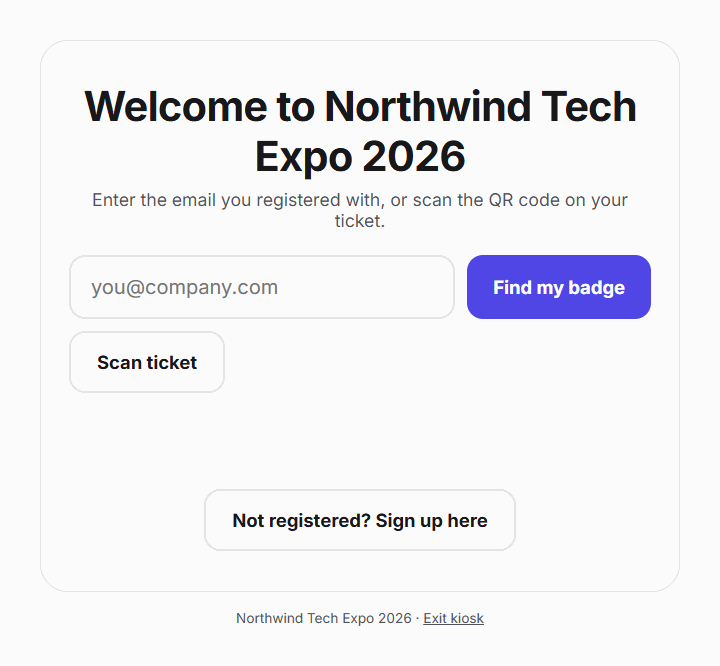
The kiosk runs in your own signed-in browser. The Exit kiosk link at the bottom goes straight back to your Attendees page. Keep the device where staff can see it, or use a volunteer station on staffed desks.
What attendees do
-
Step 1: Look up their registration
They type the exact email they registered with and tap Find my badge, or tap Scan ticket and hold up the QR code from their ticket.
-
Step 2: Pick their name
The kiosk shows only first name, last initial and company. If more than one ticket matches, they tap the right one.
-
Step 3: Print
They tap Print my badge and collect the badge from the printer.
How lookups work
- Email: must match the registration exactly; upper or lower case doesn't matter. Partial names never match, so nobody can browse your attendee list.
- Ticket scan: the Eventbrite ticket QR code or barcode, or a Badgetrac badge QR code.
- Cancelled tickets: the attendee sees That ticket was cancelled. Please see the help desk.
- Not found: the attendee sees We couldn't find that registration. Check the spelling or see the help desk.
Printing
When an attendee taps Print my badge, the badge loads in the background and the browser's print dialog opens. If the browser blocks that, the badge opens in a new tab instead. Reprints from the kiosk are logged with the reason Lost badge.
Tip: On a dedicated Chrome laptop you can skip the print dialog by starting Chrome with the --kiosk-printing option. It prints straight to the default printer, so set the paper size and margins on the printer first.
Let people register at the kiosk
To let people without a ticket sign up at the kiosk, open Actions → Walk-in desk and turn on Allow walk-in registration on the kiosk. The kiosk then shows Not registered? Sign up here. After registering, the attendee taps print to get their badge. See Register walk-ins at the door.
If check-in is paused
If the kiosk shows Check-in is paused, the event is more than 10% over its plan's attendee limit. Upgrade from Event settings, then reload the kiosk.
Related guides
- Register walk-ins at the door Add people who arrive without a ticket, print their badge on the spot, and let the kiosk take self-registrations.
- Printer and badge stock tips Match your badge size to your stock, set the print dialog to actual size with no margins, and test before doors open.
- Set up volunteer stations Give each check-in desk its own link and 6-digit PIN so volunteers can search, print and register walk-ins without your password.
Still stuck?
Tell us what you were trying to do and what you saw. We'll help you sort it out.